
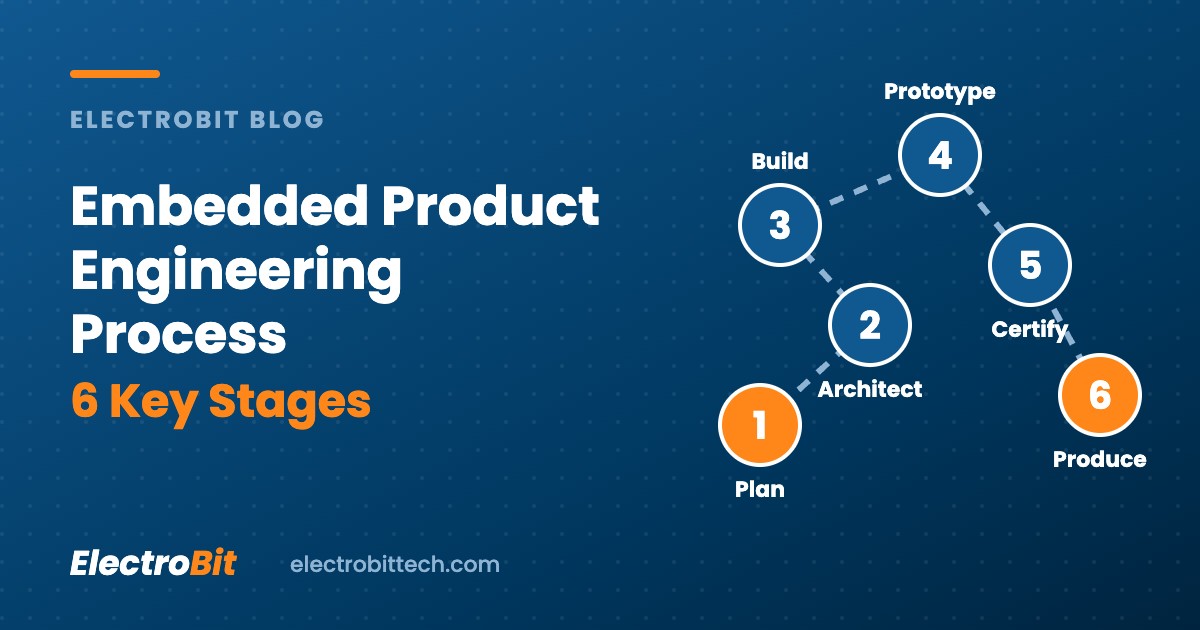
Every successful electronic product follows a structured path from idea to factory. The embedded product engineering process turns a concept into reliable hardware, firmware and software that can be certified and built at volume. Skipping or rushing a stage is the most common reason products slip their launch dates or need costly redesigns.
This guide walks through the six key stages, what happens in each, and the questions you should be able to answer before moving on. It is the same process our team follows in our embedded product engineering services for OEMs across the United States.
Why a Defined Engineering Process Matters
Embedded products combine electronics, firmware, mechanical parts, connectivity and often cloud software. Each discipline depends on decisions made by the others. A clear process keeps those decisions in the right order, so that:
- Requirements are agreed before money is spent on boards and tooling.
- Hardware and firmware teams work in parallel instead of waiting on each other.
- Compliance risks are found on the bench, not at the test lab.
- The design that leaves engineering is one the factory can actually build.
Stage 1: Discovery and Requirements
Everything starts with what the product must do and for whom. In this stage the team captures use cases, operating environment, power budget, target cost, expected volumes and the markets you plan to sell in. Regulatory needs, such as FCC rules for US sales or medical device standards, are identified here because they shape every later decision.
Output: a product requirements document with measurable targets, plus a first estimate of cost and schedule.
Stage 2: Architecture and Feasibility
Next, engineers decide how the product will be built. This covers hardware and software partitioning, processor and wireless module selection, the operating system (bare-metal, RTOS or embedded Linux), power architecture and security approach. Risky parts of the design are tested early with evaluation kits or proof-of-concept builds.
Output: a system architecture, a preliminary bill of materials (BOM) and a list of technical risks with a plan to close each one.
Stage 3: Design and Development
With the architecture agreed, the detailed work begins. Hardware engineers create schematics and PCB layouts, with signal integrity, power integrity and design-for-manufacturing (DFM) reviews. At the same time, the firmware and software teams build drivers, the board support package, application logic and connectivity, often in short sprints with regular demos.
Running these streams in parallel is one of the biggest time savers in embedded product development. Learn more about our embedded hardware development and embedded firmware development services.
Output: manufacturing-ready design files, working firmware builds and a test plan.
Stage 4: Prototyping (EVT and DVT)
Prototypes move the design from screen to bench. Most programs use at least two builds:
- EVT (engineering validation test): proves the core design works. Boards are brought up, power and signals are measured, and firmware runs on real hardware.
- DVT (design validation test): proves the product meets every requirement, including environmental, reliability and pre-compliance tests, using near-final parts and enclosures.
Problems found here are normal. The goal is to find them while a fix is still a board revision, not a product recall.
Stage 5: Verification and Certification
Before launch, the product must pass formal testing. For the US market this often includes FCC equipment authorization for anything that emits radio energy, UL or IEC 62368-1 safety testing for electronic equipment, and industry rules such as IEC 62304 for medical device software. Automated test rigs and hardware-in-the-loop testing give repeatable results and the documentation auditors expect.
Teams that ran pre-compliance checks during DVT usually pass formal tests on the first or second attempt.
Stage 6: Production and Sustenance
The final stage hands the design to manufacturing. A PVT (production validation test) build confirms the factory can produce the product at volume with consistent quality. Engineering supports the line with test fixtures, firmware programming jigs and production documentation.
After launch, the work continues: over-the-air (OTA) updates, bug fixes, security patches and component obsolescence management keep the product competitive for years.
How to Keep the Process on Track
- Use stage gates. Agree on exit criteria for each stage and review them before moving on.
- Design for test and manufacture early. DFM and DFT reviews during layout prevent factory surprises.
- Automate testing. Regression tests on every firmware build catch issues before they reach the field.
- Keep one owner for the whole lifecycle. Fewer hand-offs mean fewer gaps between hardware, firmware and production.
See how this process works on real projects in our EV logger and CTA-2045 protocol gateway case studies.
Conclusion
A disciplined embedded product engineering process reduces risk at every step: clear requirements, a sound architecture, parallel design work, honest prototyping, early compliance testing and a smooth hand-off to production. Whether you are building your first connected device or updating an existing product line, following these six stages will save time and budget.
Planning a new product? Our team provides end-to-end embedded product engineering services in the USA, from concept to production. Book a free engineering consultation.
Frequently Asked Questions
What are the stages of embedded product engineering?
The six main stages are discovery and requirements, architecture and feasibility, design and development, prototyping (EVT and DVT), verification and certification, and production and sustenance.
How long does the embedded product engineering process take?
It depends on complexity and certification needs. A simple connected device moves much faster than a regulated medical or automotive product. A good partner shares a milestone plan after the requirements review.
What is the difference between EVT, DVT and PVT?
EVT (engineering validation test) proves the design works. DVT (design validation test) proves it meets every requirement, including environmental and pre-compliance tests. PVT (production validation test) proves the factory can build it at volume with consistent quality.
When should certification testing start?
Plan for it from the architecture stage and run pre-compliance tests during prototyping. Finding an EMC or safety problem late usually means a board respin.
Electrobit Engineering Team
Our hardware, firmware and software engineers design embedded products for OEMs across the United States, from concept to production.
On this page
Need an embedded product engineering partner?
From concept to production, with an NDA before discovery.
Related articles
Embedded Product Engineering for Consumer Electronics
Consumer devices must be small, low-cost, low-power and certified. Here is how embedded product engineering makes that possible.

Benefits of Embedded Product Engineering Services
Eight practical ways an experienced embedded engineering partner helps OEMs launch faster, spend less and support products for longer.
Embedded Product Engineering vs Product Design
Product design and embedded product engineering are often confused. Here is what each one covers and how they work together.
Embedded Product Engineering Process: 6 Key Stages
A clear, stage-by-stage look at how an embedded product moves from idea to mass production, and what to check before each step.